如何使用AI 网关(LiteLLM): 统一管理AI大语言模型接入
Table of Contents
什么是 LiteLLM gateway Server? #
LiteLLM是一个开源的统一接口工具,用于简化与各种大语言模型(如OpenAI、Anthropic、Google等)的交互。它作为一个代理层,提供标准化的API接口,帮助企业集中管理多个AI服务提供商的访问、监控使用情况、控制成本,并简化技术集成。LiteLLM特别适合需要同时使用多个LLM服务的企业环境,能够显著降低管理复杂性和提高安全性。
企业痛点 #
在当今AI大语言模型(LLM)快速发展的时代,企业面临着诸多挑战:
多供应商管理困境
- 不同AI服务提供商(如OpenAI、Anthropic、Google等)需要不同的API密钥
- 每个供应商都有独立的计费系统和用量统计
- 团队需要管理多个平台的账号和密钥
成本控制难题
- 难以追踪各个团队的实际API使用量
- 缺乏统一的成本核算和预算管理
- 无法有效监控和优化API调用成本
技术集成复杂性
- 不同供应商的API接口格式各异
- 需要为每个供应商维护独立的集成代码
- 模型参数和调用方式不统一
安全与合规挑战
- API密钥分散存储,增加安全风险
- 难以实现统一的访问控制和权限管理
- 缺乏完整的审计日志和合规记录
快速开始 #
1. 环境准备 #
在开始之前,请确保您的系统满足以下要求:
- Docker 和 Docker Compose 已安装
- 已获取所需的 API 密钥(如 OpenRouter API Key 或 openai Key)
2. 安装步骤 #
mkdir litellm-server
cd litellm-server

echo 'LITELLM_MASTER_KEY="sk-1234"' > .env
echo 'LITELLM_SALT_KEY="sk-1234"' > .env

source .env
2. 配置 LiteLLM #
vi config.yaml
model_list:
  - model_name: gpt-4o-mini
    litellm_params:
      model: gpt-4o-mini
      api_key: os.environ/OPENROUTER_API_KEY
      api_base: https://openrouter.ai/api/v1
  - model_name: "gpt-4o"
    litellm_params:
      model: "openrouter/openai/gpt-4o"
      api_base: "https://openrouter.ai/api/v1"
      api_key: "os.environ/OPENROUTER_API_KEY"

general_settings:
  store_model_in_db: true
  store_prompts_in_spend_logs: true
3. 配置 Docker Compose #
version: "3.11"
services:
  litellm:
    build:
      context: .
      args:
        target: runtime
    image: ghcr.io/berriai/litellm:main-stable
    #########################################
    ## Uncomment these lines to start proxy with a config.yaml file ##
    volumes:
      - ./config.yaml:/app/config.yaml #<<- this is missing in the docker-compose file currently
    command:
      - "--config=/app/config.yaml"
    ##############################################
    ports:
      - "4000:4000" # Map the container port to the host, change the host port if necessary
    environment:
        DATABASE_URL: "postgresql://llmproxy:dbpassword9090@db:5432/litellm"
        STORE_MODEL_IN_DB: "True" # allows adding models to proxy via UI
    env_file:
      - .env # Load local .env file
    depends_on:
      - db  # Indicates that this service depends on the 'db' service, ensuring 'db' starts first
    healthcheck:  # Defines the health check configuration for the container
      test: [ "CMD", "curl", "-f", "http://localhost:4000/health/liveliness || exit 1" ]  # Command to execute for health check
      interval: 30s  # Perform health check every 30 seconds
      timeout: 10s   # Health check command times out after 10 seconds
      retries: 3     # Retry up to 3 times if health check fails
      start_period: 40s  # Wait 40 seconds after container start before beginning health checks

  db:
    image: postgres:16
    restart: always
    environment:
      POSTGRES_DB: litellm
      POSTGRES_USER: llmproxy
      POSTGRES_PASSWORD: dbpassword9090
    ports:
      - "54321:5432"
    volumes:
      - postgres_data:/var/lib/postgresql/data  # Persists Postgres data across container restarts
    healthcheck:
      test: ["CMD-SHELL", "pg_isready -d litellm -U llmproxy"]
      interval: 1s
      timeout: 5s
      retries: 10

  prometheus:
    image: prom/prometheus
    volumes:
      - prometheus_data:/prometheus
      - ./prometheus.yml:/etc/prometheus/prometheus.yml
    ports:
      - "9099:9090"
    command:
      - '--config.file=/etc/prometheus/prometheus.yml'
      - '--storage.tsdb.path=/prometheus'
      - '--storage.tsdb.retention.time=15d'
    restart: always

volumes:
  prometheus_data:
    driver: local
  postgres_data:
    name: litellm_postgres_data  # Named volume for Postgres data persistence
4. 启动服务 #
# 启动服务
docker-compose up -d

# 查看服务状态
docker-compose ps

# 查看日志
docker-compose logs -f
5. API 调用示例 #
创建虚拟密钥:访问 http://localhost:4000/ui/?userID=default_user_id&page=api-keys
调用示例:
export $LITELLM_API_KEY=xxxx
curl http://localhost:4000/chat/completions \
  -H "Content-Type: application/json" \
  -H "Authorization: Bearer $LITELLM_API_KEY" \
  -d '{
  "model": "gpt-4o-mini",
  "messages": [
    {
      "role": "system",
      "content": "你是一个助手. 叫 李四三"
    },
    {
      "role": "user",
      "content": "how are you? what your name?"
    }
  ]
}'
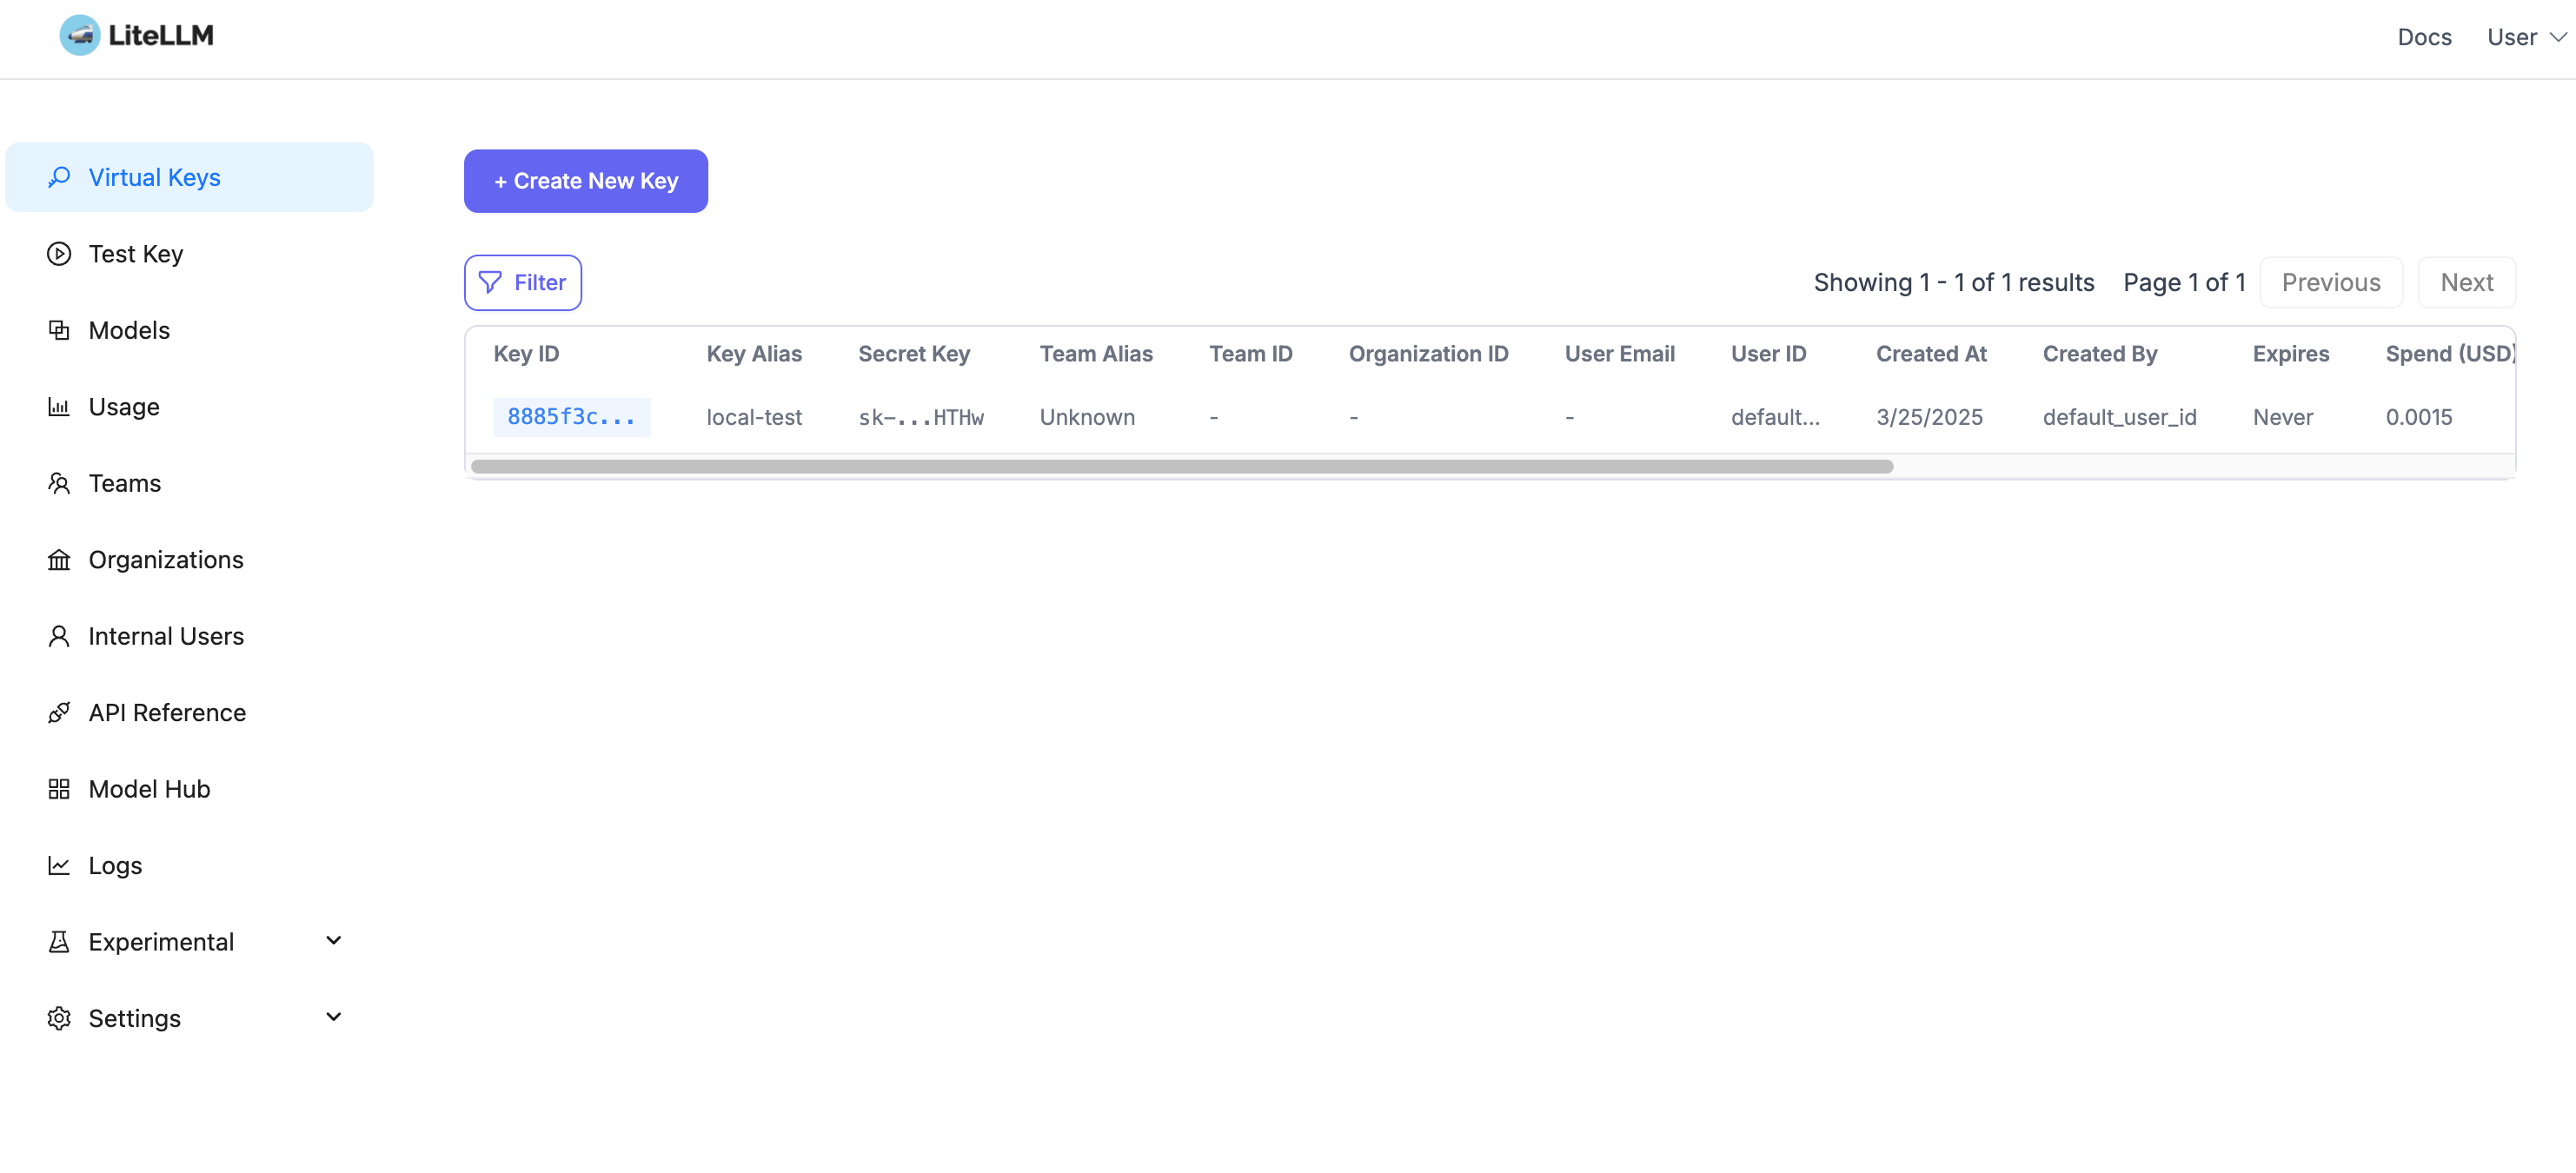
6. 管理界面 #
访问 LiteLLM 管理界面:http://localhost:4000/ui
主要功能:
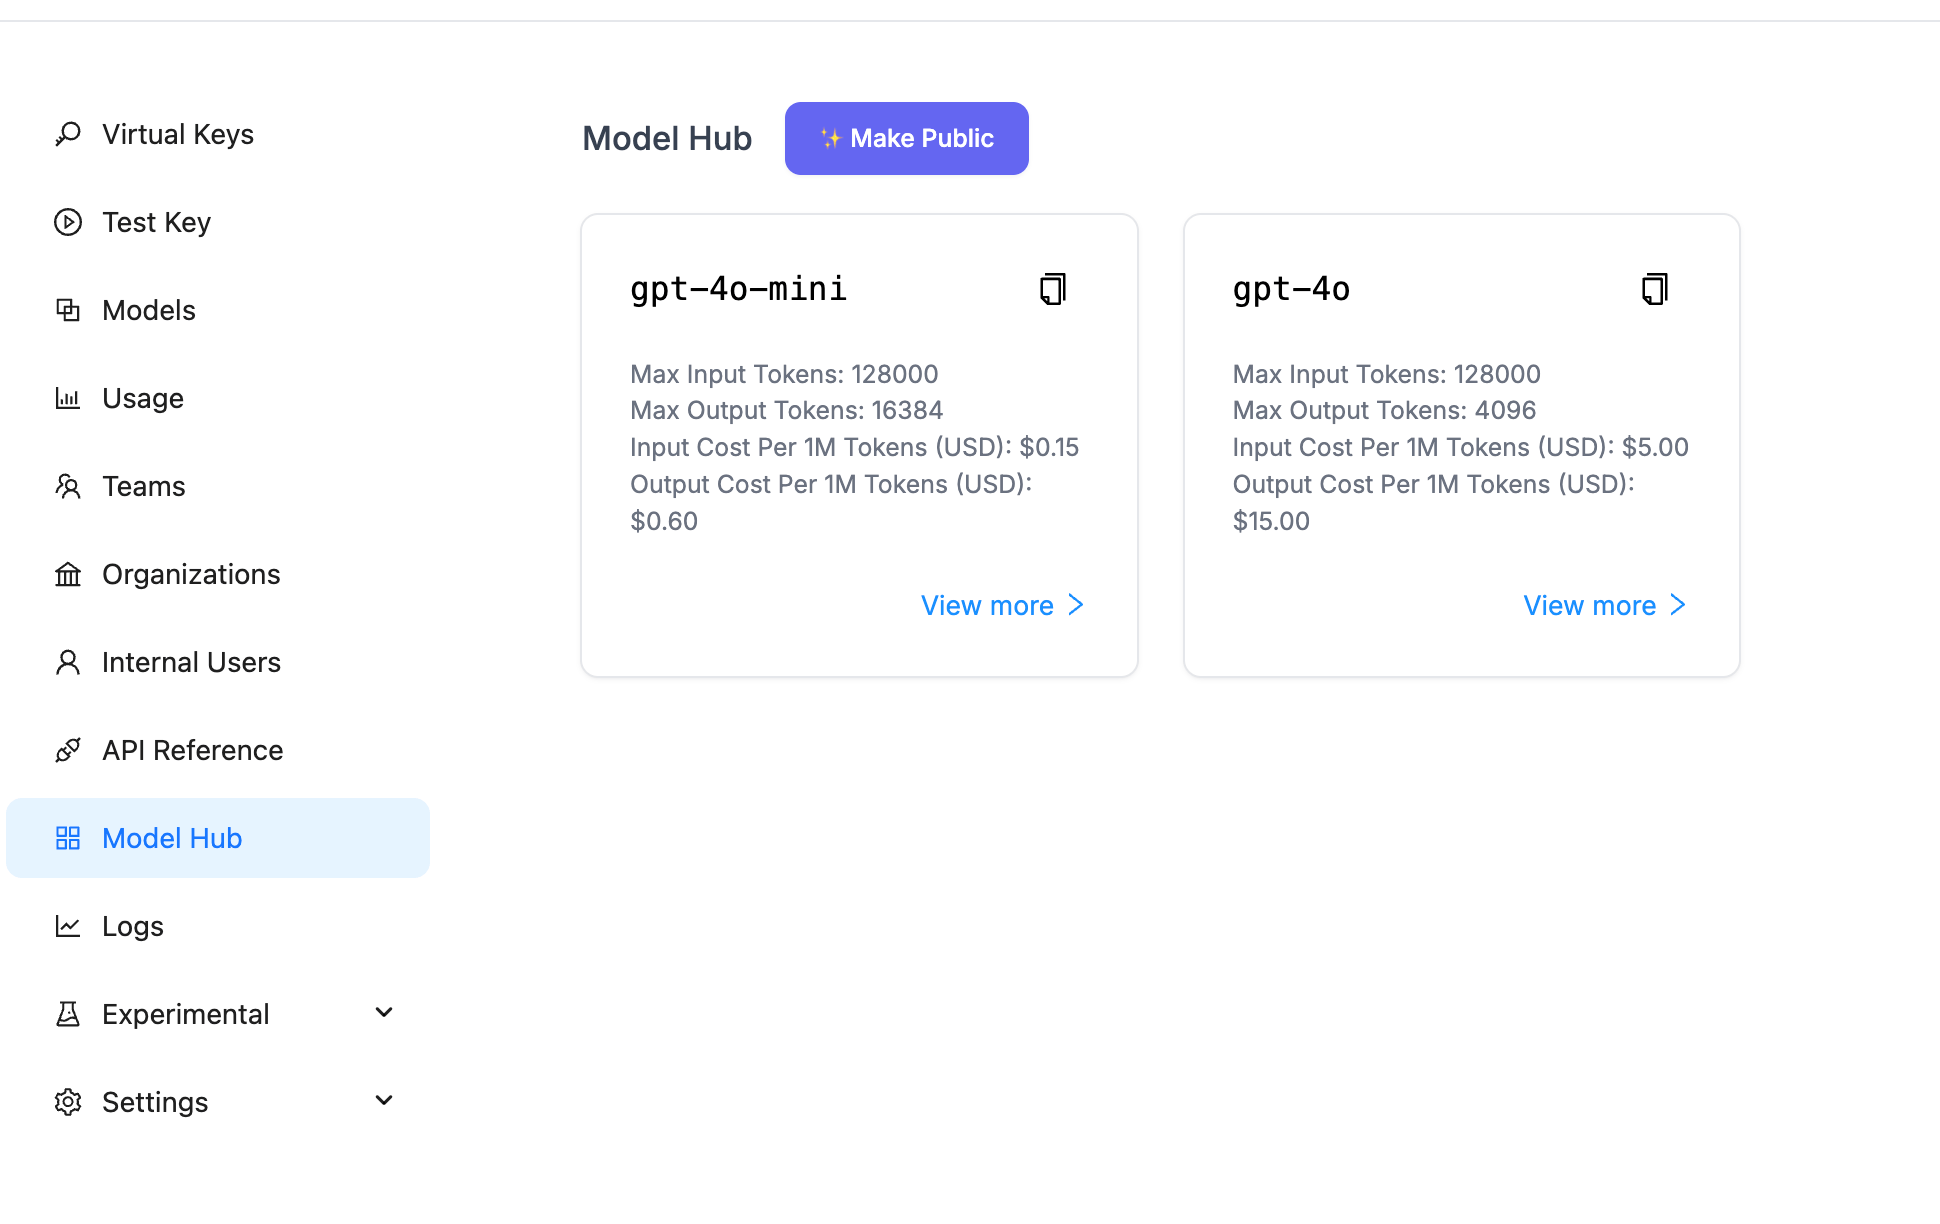
- 模型管理:查看和配置可用的模型
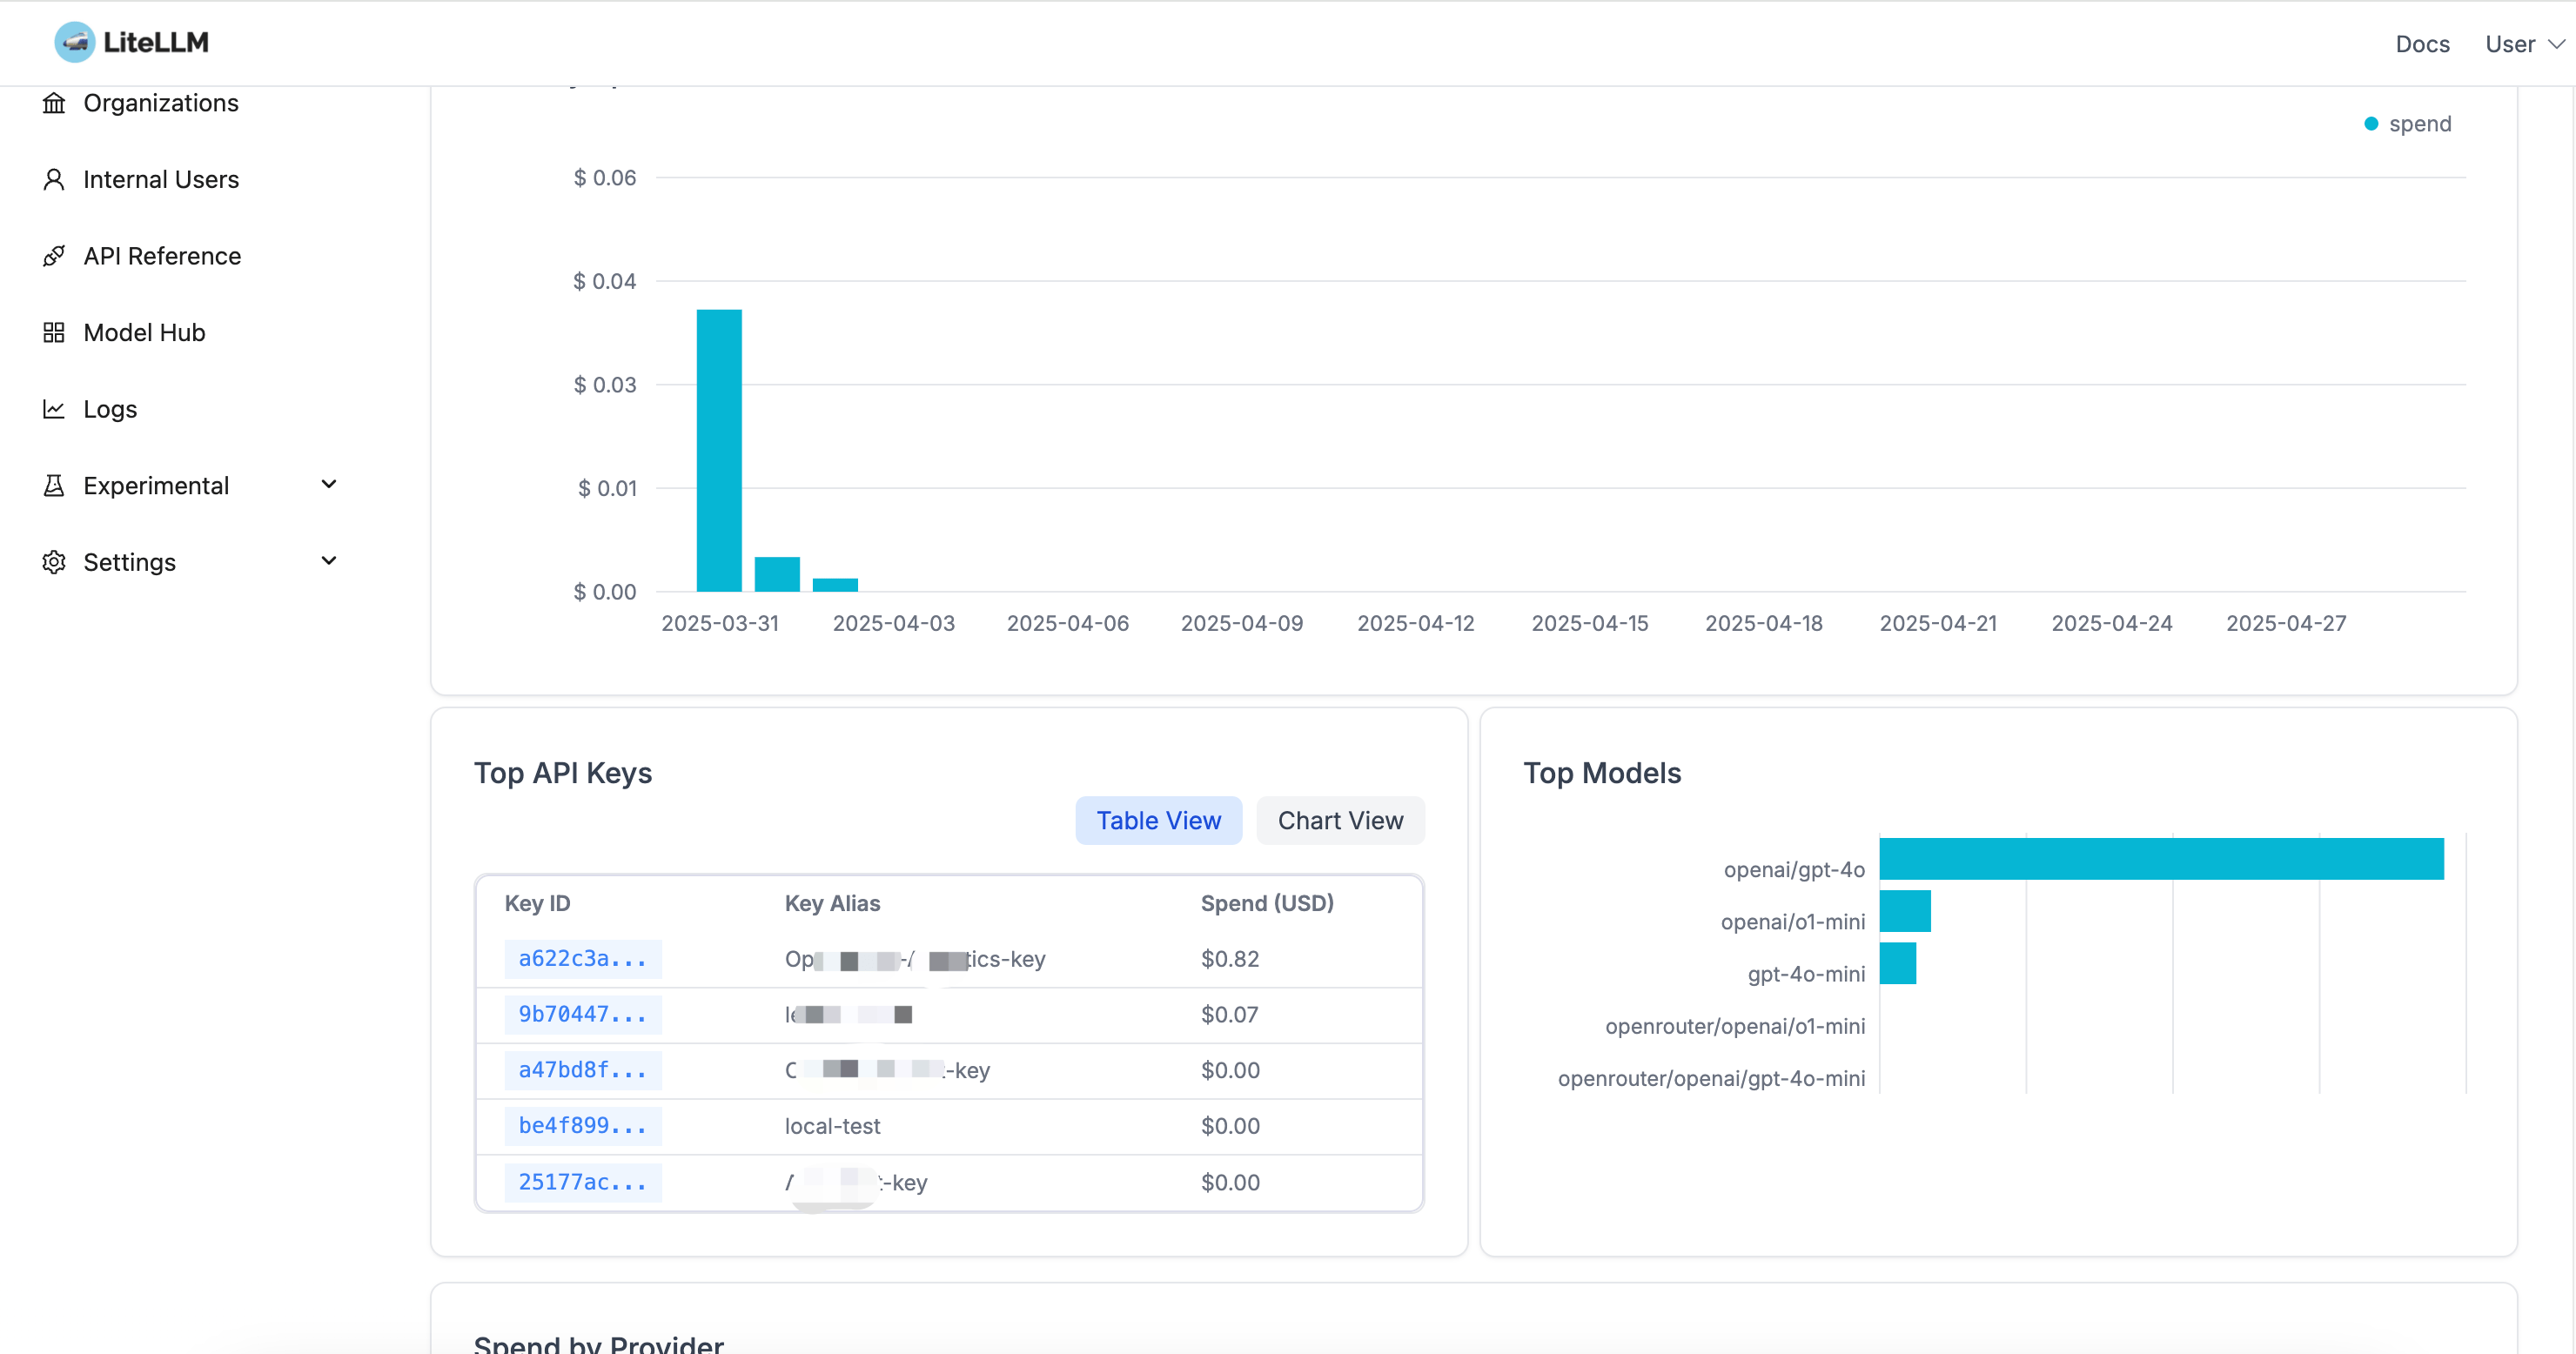
- 用量统计:监控 API 调用情况和成本
- 密钥管理:创建和管理虚拟密钥
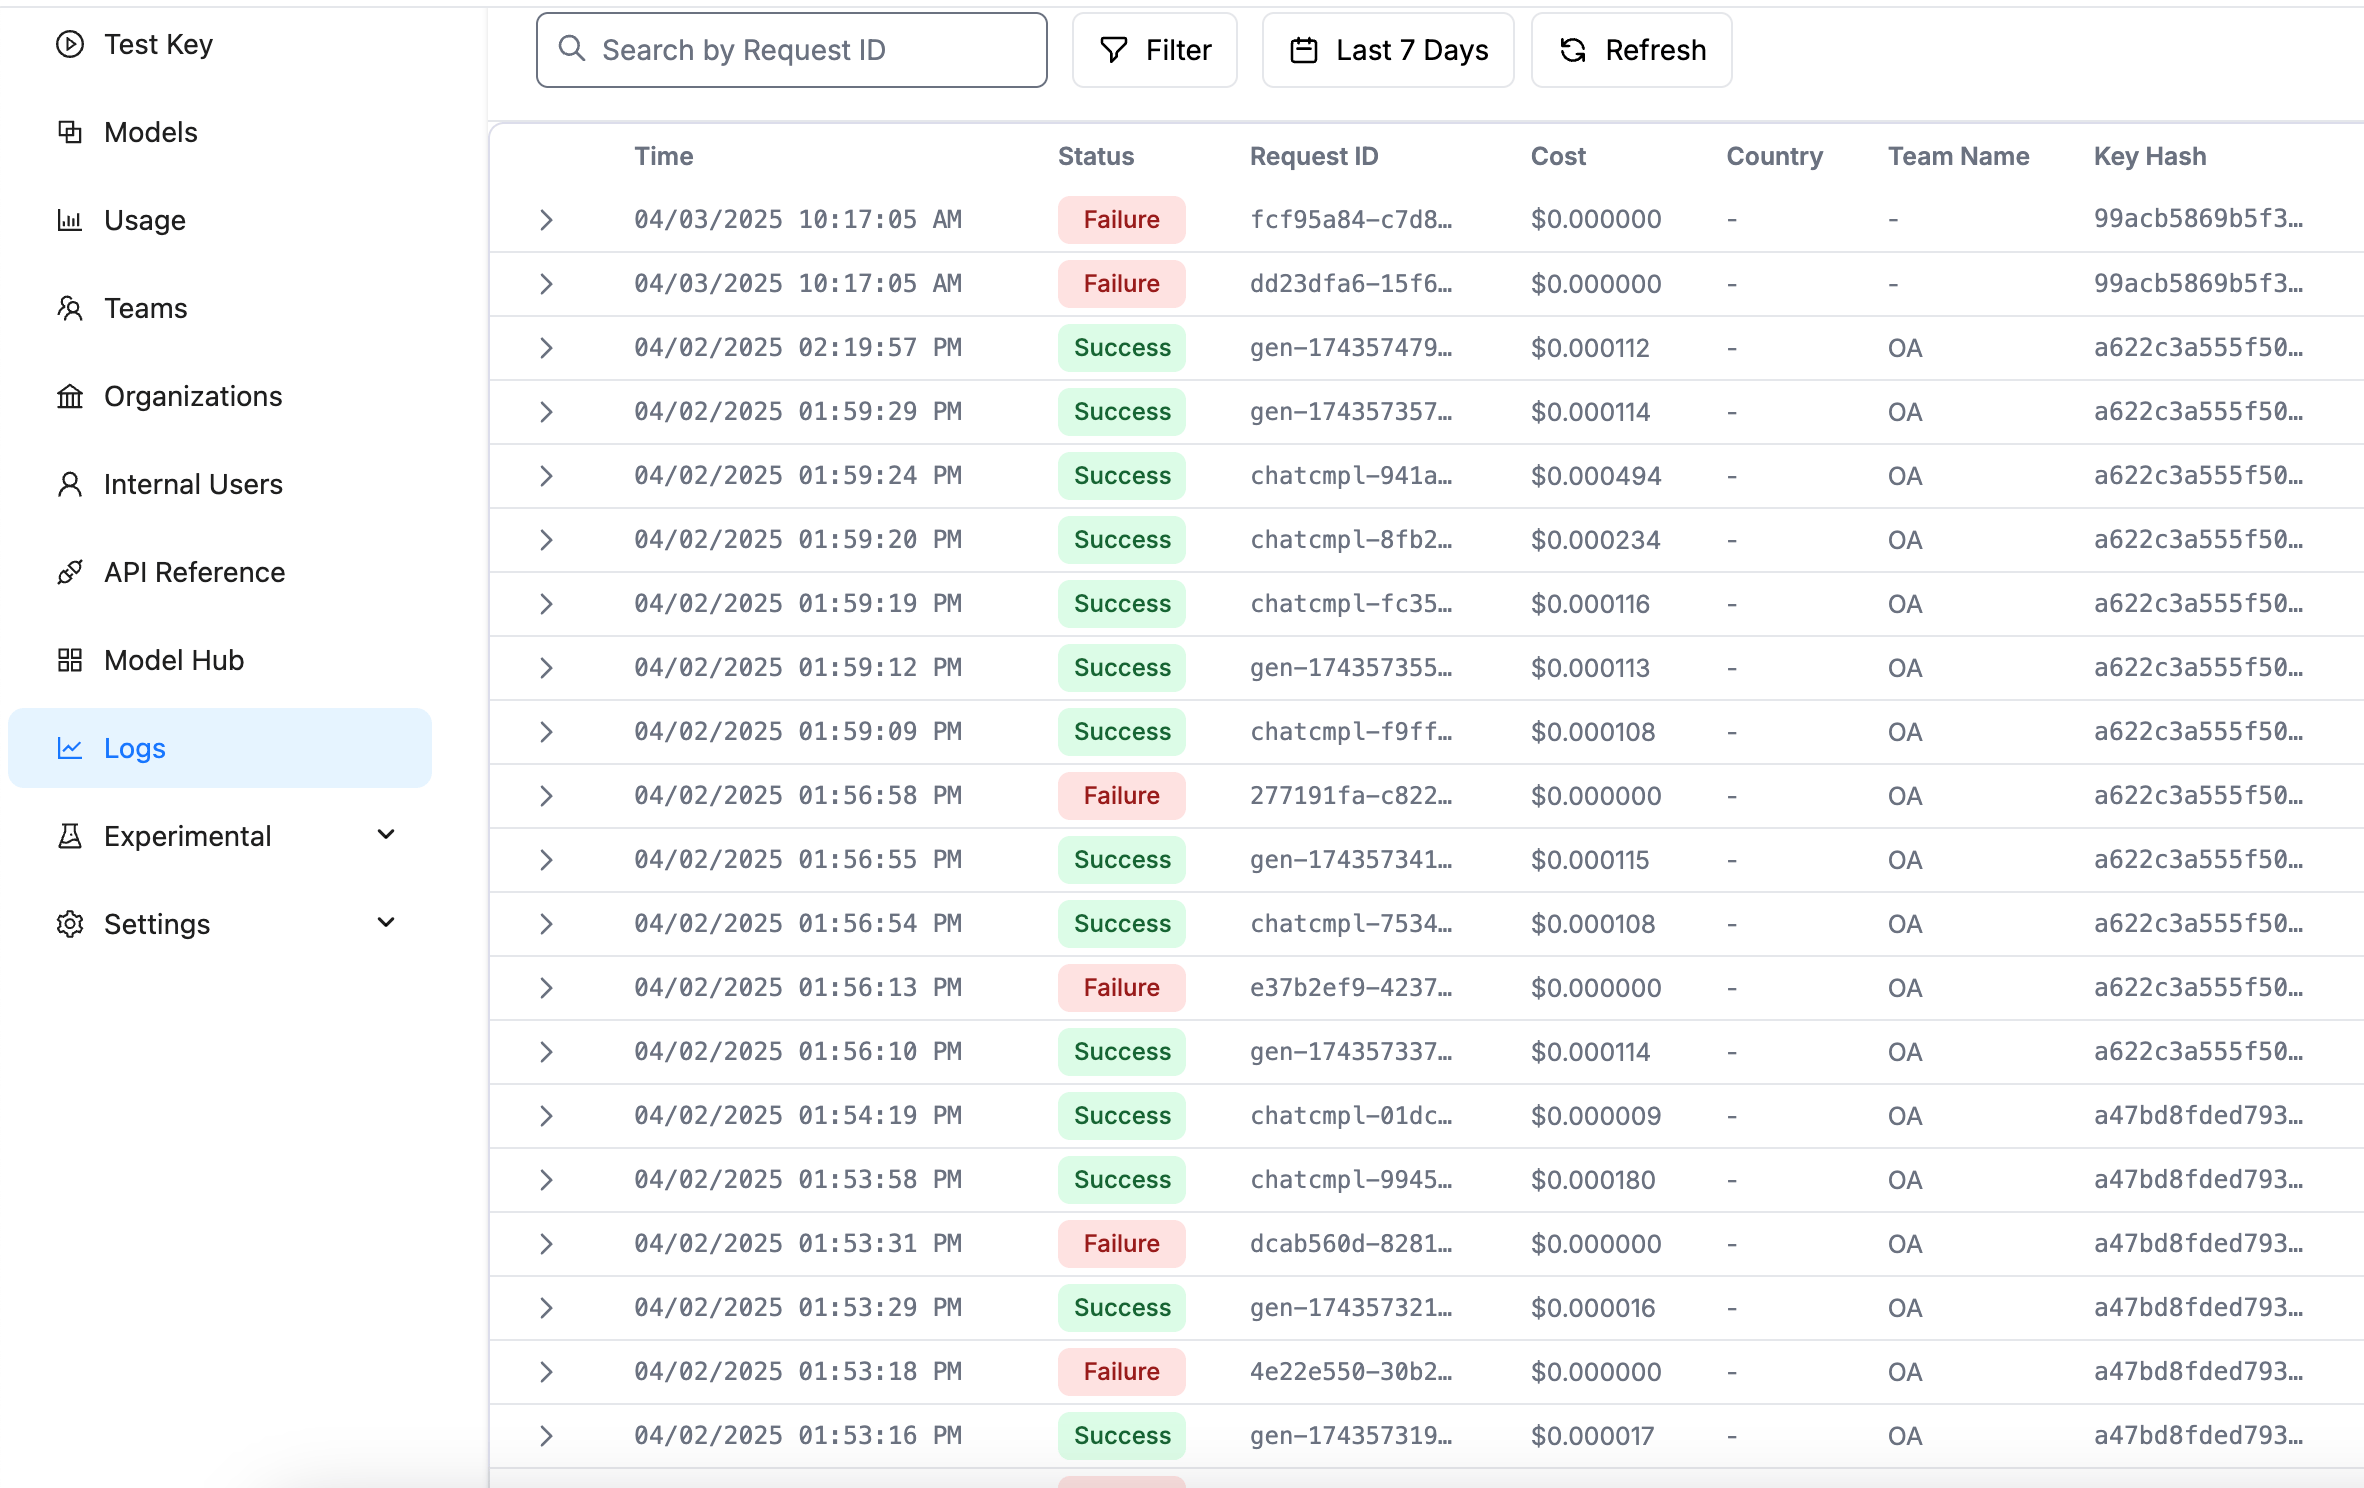
- 日志查看:查看详细的调用日志
界面预览:
总结 #
LiteLLM作为一个统一的LLM代理层,为企业提供了一个优雅的解决方案:
统一的API接口
- 提供标准化的接口,简化集成工作
- 无需修改现有代码即可切换不同的AI服务提供商
- 统一的模型参数和调用方式
集中的密钥管理
- 虚拟密钥系统,保护原始API密钥
- 统一的密钥管理和轮换机制
- 细粒度的访问控制和权限管理
完整的监控和分析
- 统一的用量统计和成本分析
- 详细的调用日志和性能监控
- 支持多团队资源分配和计费
灵活的部署选项
- 支持本地部署和云服务
- 可扩展的架构设计
- 丰富的集成选项